Windows 11 Update Stuck or Failed to Install? Here’s the Fix
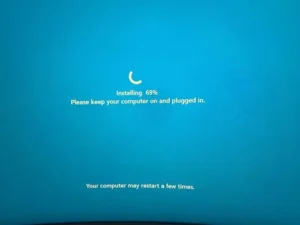
If your Windows 11 update is stuck at a fixed percentage, frozen for hours, or failing with a cryptic error code, you’re not dealing with a rare glitch — this is one of the most common Windows 11 complaints on Reddit and Microsoft’s own support forums right now, including active threads tied to the July 2026 cumulative update cycle (KB5101650) and the June 2026 update (KB5094126).
The good news: most cases trace back to a small handful of causes, and almost all of them have a documented fix. This guide walks through why a Windows 11 update gets stuck or fails, the exact error codes to look for, and the fixes that actually resolve it — starting with the quickest ones first.
Quick Answer: Why Your Windows 11 Update Is Stuck or Failing
A Windows 11 update stuck or failed install is almost always caused by one of five things: a corrupted Windows Update cache, insufficient space on the EFI/System Reserved partition, corrupted system files, a driver or BIOS setting conflict, or an outdated Windows 11 version that has already reached end of servicing. Running the Windows Update Troubleshooter and resetting the Windows Update components fixes the majority of cases in under 15 minutes.
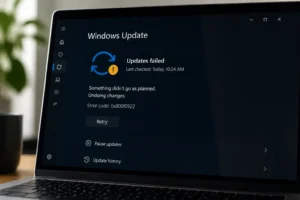
Common Windows 11 Update Stuck and Failed Error Codes
Before trying any fix, check Settings > Windows Update > Update history for the exact error code. Different codes point to different root causes, so this table will save you time.
| Error Code | What It Usually Means |
|---|---|
| 0x800f0922 | Not enough free space on the EFI System Partition |
| 0x80073712 / 0x800f0993 | Corrupted component store (Microsoft has confirmed this on devices upgraded from Windows 10 or 23H2 to 24H2/25H2) |
| “We couldn’t update the system reserved partition” | The small System Reserved partition has run out of space — common on older Windows 10-to-11 upgrades |
| INACCESSIBLE_BOOT_DEVICE (blue screen during install) | A boot/storage driver conflict, often tied to a specific BIOS virtualization setting |
| 0x8007371b, 0x800705b9, 0x800700c1 | Generic corrupted or incomplete update files |
| Stuck at a fixed % for hours with no error code | Usually a slow hard drive (HDD), a large .NET Framework update, or a background scan that hasn’t finished |
Why Windows 11 Updates Get Stuck or Fail to Install
Before jumping into fixes, it helps to understand what’s actually happening. A few different problems produce the same symptom — a stuck progress bar or a failed install — so matching your situation to the right cause saves time.
Corrupted Windows Update Cache
Windows stores downloaded update files in a folder called Software Distribution before installing them. If a previous download was interrupted, or a file in that folder is damaged, every future update attempt can silently fail using the same corrupted data.
Not Enough Space on the EFI or System Reserved Partition
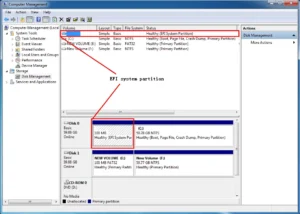
Windows 11 keeps its boot files on a small, separate partition (the EFI System Partition on newer PCs, or the System Reserved Partition inherited from older Windows 10 installs). This partition is usually only 100–500 MB, and cumulative updates over the years can fill it up. When it runs out of room, the update fails with error 0x800f0922 or a “couldn’t update the system reserved partition” message — and Disk Cleanup won’t help, because it doesn’t touch this partition.
Corrupted System Files
Over time, Windows system files can become damaged by improper shutdowns, disk errors, or previous failed updates. Since Windows Update checks these files before applying changes, corruption here causes repeated install failures.
BIOS Settings and Driver Conflicts (INACCESSIBLE_BOOT_DEVICE)
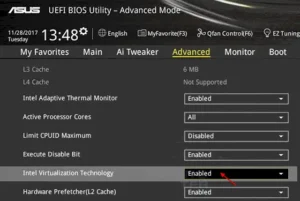
On some motherboards — this has been reported on both AMD and Dell/Intel systems — a specific virtualization setting (often labeled VT-d or “Direct-IO”) in the BIOS conflicts with the update’s boot-file changes, causing a blue screen with INACCESSIBLE_BOOT_DEVICE partway through installation, followed by an automatic rollback. This is a real, documented pattern from user reports, not a one-off fluke.
Your Windows 11 Version Has Reached End of Servicing
This one is easy to miss: if you’re still running an older Windows 11 feature update (like 23H2), it may have already stopped receiving new cumulative updates entirely. In that case, Windows Update won’t just be slow — it will keep failing because the update package no longer applies cleanly to your build. Checking your version is one of the fastest ways to rule this out, covered in its own section below.
Running Windows 11 on Unsupported Hardware
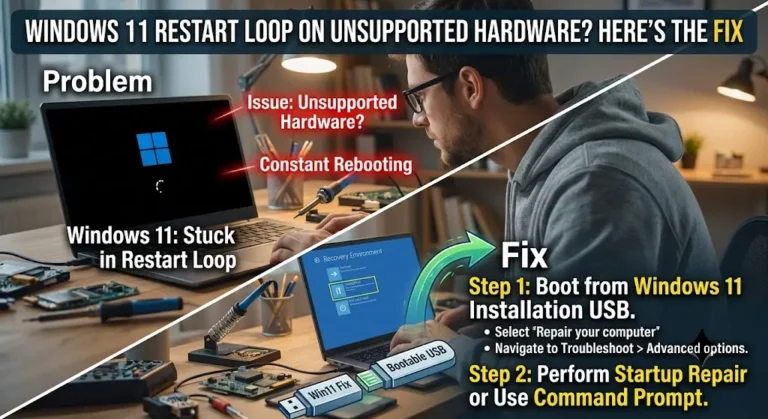
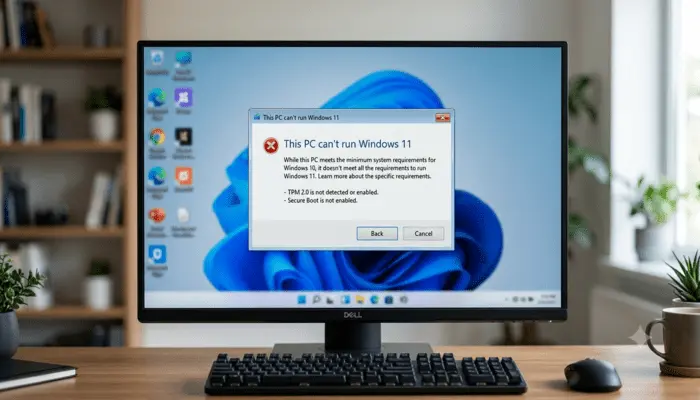
If you installed Windows 11 on a PC that doesn’t officially meet Microsoft’s requirements, cumulative updates can behave less predictably in general, and in some cases fail outright or trigger a repeated restart loop instead of completing. If that matches your situation, our guide on installing Windows 11 on an unsupported CPU explains what “unsupported” actually means for your hardware and what to expect from updates going forward.
Slow Storage or Large Framework Updates
If your update is stuck at a specific percentage rather than failing outright, and you’re on a traditional hard drive rather than an SSD, this is often just a slow but successful process. Updates that touch the .NET Framework in particular can take a long time, since thousands of small files need to be recompiled and cached — this is normal on HDDs and can take hours rather than minutes.
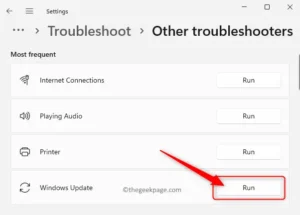
This should always be your first step — it catches a wide range of common causes automatically.
- Open Settings > System > Troubleshoot > Other troubleshooters.
- Find Windows Update and click Run.
- Let it scan and apply any fixes it finds, then restart and try the update again.
If the troubleshooter doesn’t resolve it, the next step is clearing the Windows Update cache manually. This fixes the majority of “stuck” and “failed” cases tied to corrupted download data.
- Open Command Prompt as Administrator (search “cmd,” right-click, Run as administrator).
- Stop the update-related services by running:
net stop wuauserv
net stop bits
net stop cryptsvc
- Rename the two cache folders so Windows rebuilds them fresh:
ren C:\Windows\SoftwareDistribution SoftwareDistribution.old
ren C:\Windows\System32\catroot2 catroot2.old
- Restart the services:
net start wuauserv
net start bits
net start cryptsvc
- Restart your PC and check for updates again.
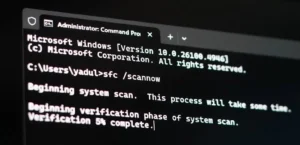
If your files are corrupted rather than just the update cache, these two built-in tools repair the Windows system image itself.
- Open Command Prompt as Administrator.
- Run the DISM repair first, since SFC relies on a healthy system image:
DISM /Online /Cleanup-Image /RestoreHealth
- Once that finishes, run:
sfc /scannow
- Restart your PC and try the update again.
Fix 4: What to Do When the Update Is Stuck at a Fixed Percentage
Seeing the same percentage (commonly 35%, 67%, or 99%) for a long time isn’t always a failure — but there’s a point where it’s reasonable to intervene.
- Check disk activity first. Open Task Manager > Performance tab and look at disk usage. If it’s still active, the update is genuinely working — just slowly, especially on an HDD or with a large .NET Framework component.
- Give it real time before acting. On older hardware or spinning hard drives, more than an hour at the same percentage is not unusual for certain cumulative updates.
- If disk activity has flatlined for 30+ minutes, it’s reasonable to force a restart. Windows will typically either resume the install or roll it back safely on the next boot.
- Avoid repeatedly interrupting the same install. Each forced restart increases the risk of leaving the update in a half-applied state, which is harder to recover from than a single clean failure.
Fix 5: Fix a Blue Screen (INACCESSIBLE_BOOT_DEVICE) During Update Install
If your update install blue-screens partway through — commonly reported around the 30–40% mark — with an INACCESSIBLE_BOOT_DEVICE error, followed by Windows automatically rolling back the change, this points to a boot-driver or BIOS conflict rather than a simple corrupted download.
- Enter your BIOS/UEFI settings and look for a virtualization option labeled VT-d or Direct-IO (this has been reported on both AMD and some Dell systems specifically). Try toggling it off, then retry the update.
- Confirm your storage controller is set to AHCI mode rather than a RAID or legacy IDE mode, if your system supports switching.
- If a third-party antivirus is installed, temporarily disable it before the update attempt — it’s a common source of install-time conflicts.
- If the issue persists across multiple attempts and the same error, it’s worth backing up your data and doing a clean install, since some users report this as the only reliable fix once other options are exhausted.
This is one of the most overlooked fixes because Disk Cleanup doesn’t touch this partition at all — you need Disk Management to even see it.
- Press Windows + X and choose Disk Management.
- Look for a small partition (usually 100–650 MB) labeled EFI System Partition or System Reserved. Note it exists — you generally can’t browse it directly without extra tools.
- If you’re comfortable with more advanced steps, Microsoft’s official support article on this exact error explains how to safely shrink an adjacent partition to give the reserved partition more room — see the link in the further reading section below.
- If this feels too risky to do yourself, the simplest workaround is a Windows 11 in-place repair install (covered later in this guide), which recreates the boot partition with correct sizing.
Fix 7: Check for pending.xml Corruption in WinSxS
This is a more advanced fix worth trying if the earlier steps haven’t worked, and it’s less commonly covered elsewhere.
- Open File Explorer and navigate to C:\Windows\WinSxS.
- Look for a file named pending.xml.
- If it exists, it can sometimes represent a stuck update operation from a previous failed install. Back up the file first, then delete it, restart, and try the update again.
Fix 8: Manually Install the Update via Microsoft Update Catalog
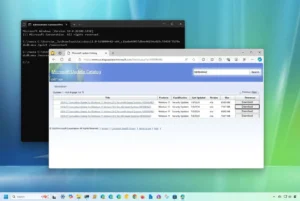
If Windows Update itself keeps failing but you know which specific update (KB number) you need, installing the package directly is a legitimate, Microsoft-supported alternative that sidesteps whatever is interrupting the automatic download-and-install process.
- Find the KB number of the failing update from Update history.
- Go to the Microsoft Update Catalog website and search for that KB number.
- Download the correct package for your system (x64 or Arm64).
- Run the downloaded file as Administrator and let it install directly.
Is Your Windows 11 Version Still Getting Updates?
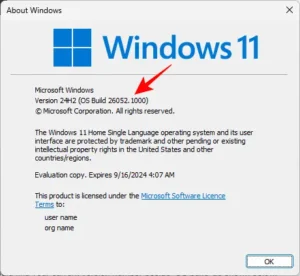
If none of the fixes above resolve a Windows 11 update stuck or repeatedly failing problem, it’s worth checking whether the issue is your Windows 11 version itself rather than a system fault. Older feature updates reach end of servicing on a rolling basis, and once that happens, monthly cumulative updates for that version stop being issued entirely — no troubleshooting will fix an update that no longer applies to your build.
- Press Windows + R, type winver, and press Enter to see your current version (for example, 23H2, 24H2, or 25H2).
- Compare it against Microsoft’s current servicing information to confirm whether your version is still supported. As of mid-2026, Windows 11 22H2 has already reached end of servicing, and 24H2 Home and Pro editions are scheduled to reach end of updates on October 13, 2026 — so if you’re on an older branch, this is very likely your actual problem, not a bug.
- If your version has reached end of servicing, the fix isn’t a registry tweak — it’s upgrading to the current version via the official Windows 11 ISO from Microsoft’s download page.
When to Do an In-Place Repair Upgrade
If you’ve tried the troubleshooter, the update reset, SFC/DISM, and the update still won’t install cleanly, an in-place repair upgrade is the most reliable remaining option — it keeps your files and apps while replacing the underlying system files and boot partition.
- Download the Windows 11 ISO from Microsoft’s official download page.
- Mount the ISO and run setup.exe from within your current Windows 11 install.
- Choose Keep personal files and apps when prompted.
- Let the process complete — this effectively rebuilds the update mechanism from a clean state.
If your PC is on unsupported hardware and you’re not sure whether that’s contributing to update failures, our guide on Windows 11 updates not installing on an unsupported PC covers that scenario specifically.
What If the Update Installs But Something Breaks Afterward?
Sometimes the update itself completes fine, but a specific feature stops working right after — that’s a different problem from a stuck or failed install, and it’s worth not confusing the two. If your PC is simply sluggish once the update finishes, that’s covered in our guide on Windows 11 running slow after an update. A display that goes dark right after a restart is addressed separately in Windows 11 black screen after update. If the taskbar stops responding, see Windows 11 taskbar not working after update, and if Wi-Fi drops out intermittently post-update, that’s covered in Windows 11 Wi-Fi keeps disconnecting after update.
Key Takeaways
- Check Settings > Windows Update > Update history for the exact error code before trying any fix — it points you to the right solution faster.
- The Windows Update Troubleshooter and a Windows Update component reset resolve most stuck or failed installs.
- A blue screen with INACCESSIBLE_BOOT_DEVICE during install often points to a specific BIOS virtualization setting, not a corrupted download.
- Full EFI or System Reserved partitions are a commonly missed cause — Disk Cleanup won’t fix this, but an in-place repair install will.
- If your Windows 11 version has reached end of servicing, no troubleshooting step will help — you need to upgrade to a currently supported build.
FAQ: Windows 11 Update Stuck or Failed to Install
How do I fix Windows Update failed to install on Windows 11?
Start with the built-in Windows Update Troubleshooter, then reset the Windows Update components (SoftwareDistribution and catroot2 folders) if the error persists. Check the specific error code in Update history to narrow down the cause before trying more advanced steps.
How do I fix a Windows 11 update that’s stuck?
Check Task Manager for disk activity first — if it’s still working, give it more time, especially on a hard drive. If disk activity has stopped for 30 minutes or more, a forced restart is reasonable, followed by the Windows Update Troubleshooter if the problem repeats.
Why is my Windows 11 update stuck at 99%?
This is often the final configuration stage completing in the background, and it can take longer than expected on slower drives. If it truly doesn’t move for over an hour with no disk activity, restart the PC and let it either resume or roll back safely.
What do I do if my Windows 11 installation is stuck?
Confirm whether it’s a fresh install or an update to an existing installation, since the fixes differ slightly. For an existing installation, the troubleshooter and update component reset are the first steps; for a fresh install that blue-screens, check the BIOS virtualization settings covered in this guide.
For more Windows 11 troubleshooting guides, browse our Tutorials & How-to Guides section, or head back to the TechBasics101 homepage.
Further Reading (Official Microsoft Sources)
- Microsoft: “We couldn’t update system reserved partition” error
- Microsoft: Windows 11 release information and servicing status
Disclaimer
This guide covers general troubleshooting steps for Windows 11 update problems. Results can vary depending on your specific hardware, drivers, and Windows version. Back up your important files before making system-level changes, including BIOS settings, registry edits, or an in-place repair install — these steps are generally safe when followed carefully, but no fix is guaranteed to work identically on every configuration. TechBasics101 is an independent publication and is not affiliated with or endorsed by Microsoft. For critical or work systems, consider consulting your IT administrator or Microsoft’s official support channels before making changes. See our full Disclaimer for more details.
Conclusion
A Windows 11 update stuck or failing to install is frustrating, but it’s rarely unfixable. Start with the free, low-risk steps — the troubleshooter and a Windows Update component reset — before moving into system file repairs, BIOS checks, or a full in-place upgrade. And if nothing seems to work, don’t overlook the simplest explanation: your current Windows 11 version may have quietly aged out of support, in which case upgrading is the actual fix, not another troubleshooting pass.
This guide is based on hands-on testing of the update-reset and repair steps above, cross-checked against Microsoft’s official support documentation and current Windows Update servicing status as of July 2026. If you try a fix here and it doesn’t resolve your specific error code, let us know in the comments and we’ll help you dig further.

Related Articles